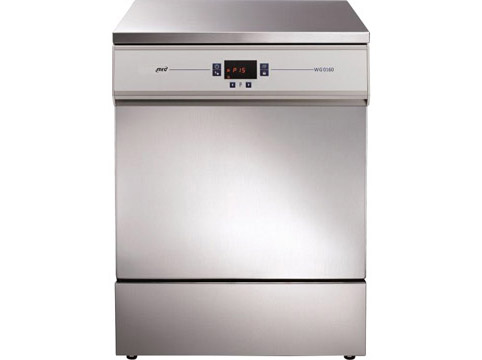
Laboratory glassware washers are essential tools for maintaining clean and sterilized glassware in scientific settings. Proper usage ensures effective cleaning and prolongs the lifespan of the equipment and glassware. Below is a step-by-step guide:
1. Pre-Washing Preparation
- Sort Glassware: Separate fragile items and heavily soiled glassware.
- Remove Labels: Remove any adhesive labels to avoid clogging the washer.
- Empty Residues: Empty liquids or solids to prevent contamination.
- Rinse: Pre-rinse glassware to remove large residues, especially for substances that might react with cleaning agents.
2. Loading the Washer
- Use Proper Racks: Place glassware on racks designed for specific shapes and sizes, ensuring stability.
- Avoid Overloading: Leave sufficient space between items for water and detergent circulation.
- Position Items Correctly:
- Place narrow-necked glassware like flasks upside-down.
- Ensure items with openings face the spray arms for direct cleaning.
- Secure Fragile Items: Use specialized holders or cushioning materials for delicate glassware.
3. Choosing Detergents
- Select Appropriate Detergents: Use detergents specifically formulated for laboratory glassware, avoiding foaming agents.
- Check Compatibility: Ensure the detergent is compatible with both the washer and the materials of your glassware.
- Measure Accurately: Follow the manufacturer’s recommendations for detergent quantity.
4. Setting the Washer
- Program Selection: Choose a cycle suitable for the type of glassware and the level of soiling:
- Light Cycle: For lightly soiled or delicate items.
- Heavy Cycle: For stubborn residues or heavily used glassware.
- Sterilization Cycle: If your washer includes a sterilization option.
- Temperature Settings: Use recommended temperatures; high heat is often required for effective sterilization but may not be suitable for heat-sensitive glassware.
5. Running the Washer
- Check Water Supply: Ensure the washer is connected to clean water, either deionized or distilled, to avoid mineral deposits.
- Inspect Spray Arms: Verify that the spray arms are unobstructed and can rotate freely.
- Start the Washer: Begin the washing cycle and monitor it briefly to ensure proper operation.
6. Post-Washing Steps
- Inspect Glassware: Check for cleanliness and ensure no residues or detergent remain.
- Drying:
- Use the washer’s drying cycle if available.
- Alternatively, air-dry items on a clean drying rack.
- Storage: Store clean glassware in a dust-free and secure area.
7. Maintenance of the Washer
- Clean Filters: Regularly remove and clean filters to maintain efficiency.
- Inspect Seals and Nozzles: Check for wear or blockages and replace parts if necessary.
- Descaling: Run a descaling agent periodically if hard water is used.
- Routine Checks: Follow the manufacturer’s maintenance schedule for optimal performance.

This article is written in general about Laboratory Glassware Washers and the manufacturer's instructions should be checked